It’s Twilight Time

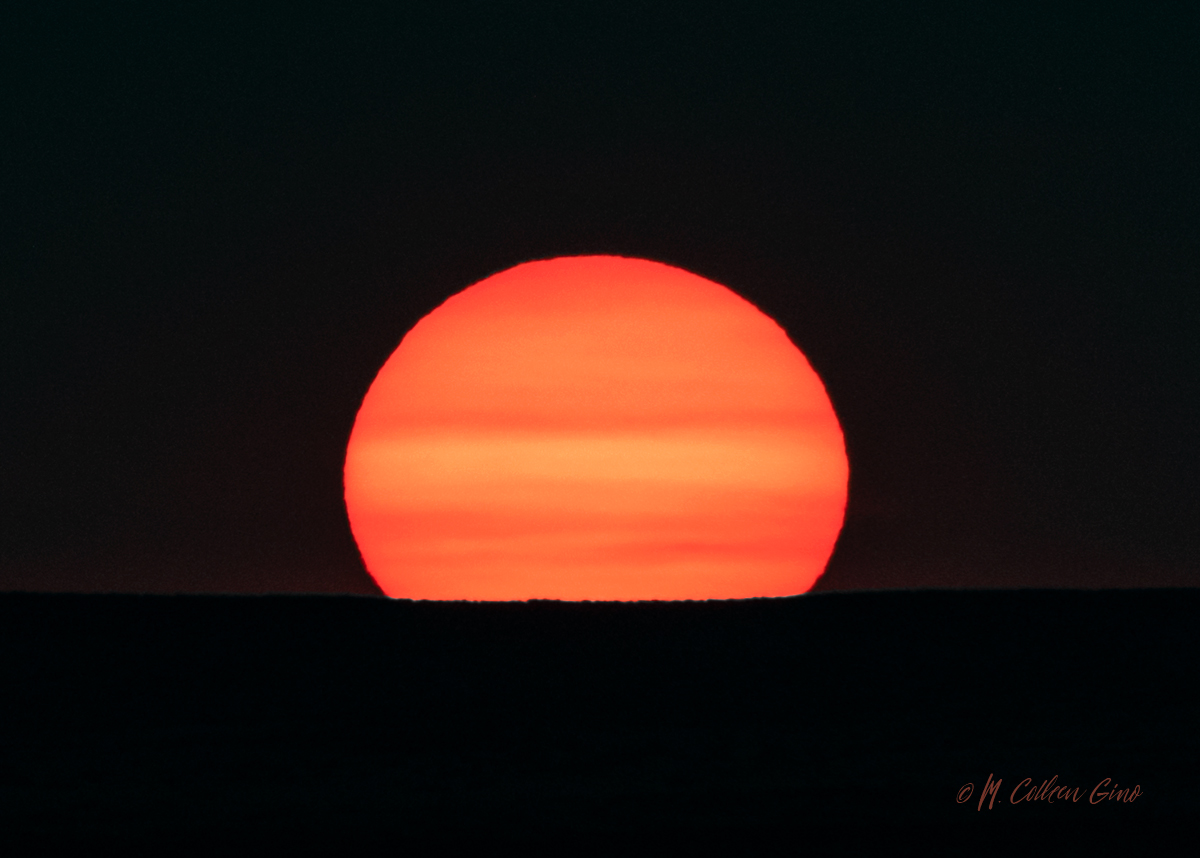
Twilight is more than a seriously successful but silly series of movies about vampires, and Twilight Time is more than a song by The Platters. Twilight refers to a very specific time of day; the time of day when the Sun is below the horizon but our atmosphere is still illuminated to some degree by sunlight. This happens twice a day at the transition from day to night (dusk), then again in the transition from night to day (dawn). These twilight periods at dusk and dawn are further separated into three time periods: civil twilight, nautical twilight, and astronomical twilight.

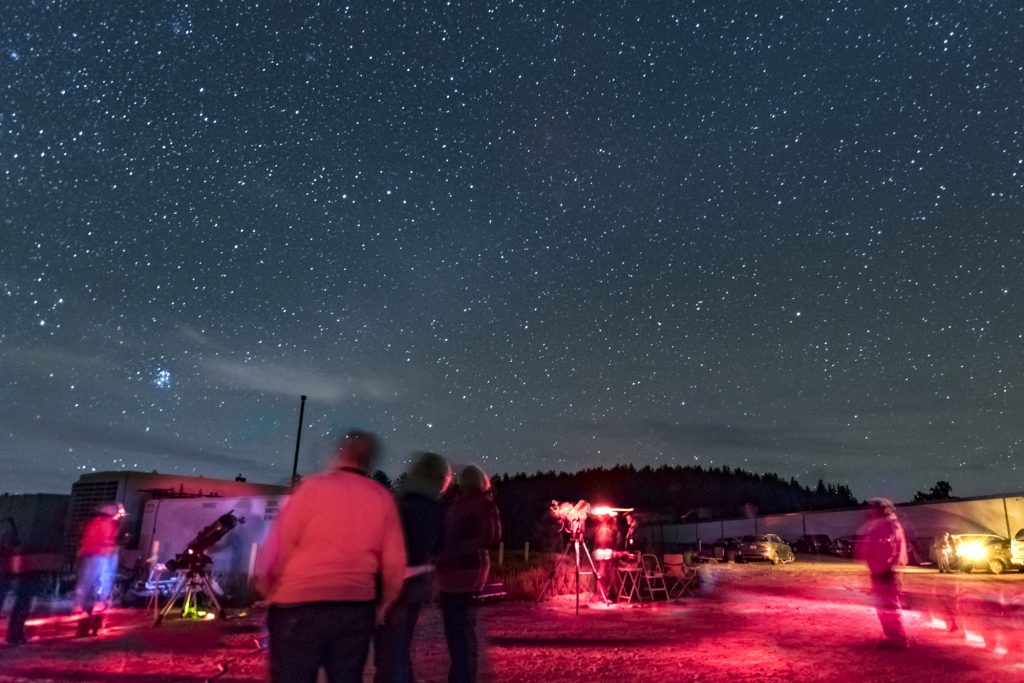
Civil twilight begins in the morning when the center of the Sun is 6° below the horizon, and ends when the Sun rises. In the evening, civil twilight begins when the Sun sets and ends when the center of the Sun is 6° below the horizon. This form of twilight has the brightest sky, and barring other conditions such as clouds or fog, there’s enough sunlight to continue outdoor activities without artificial light. At this time the brightest stars and planets can be seen as well.

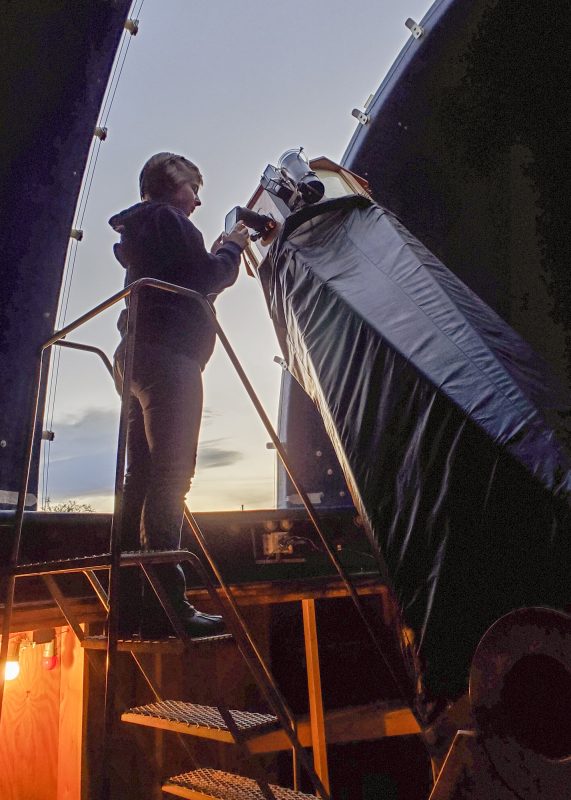
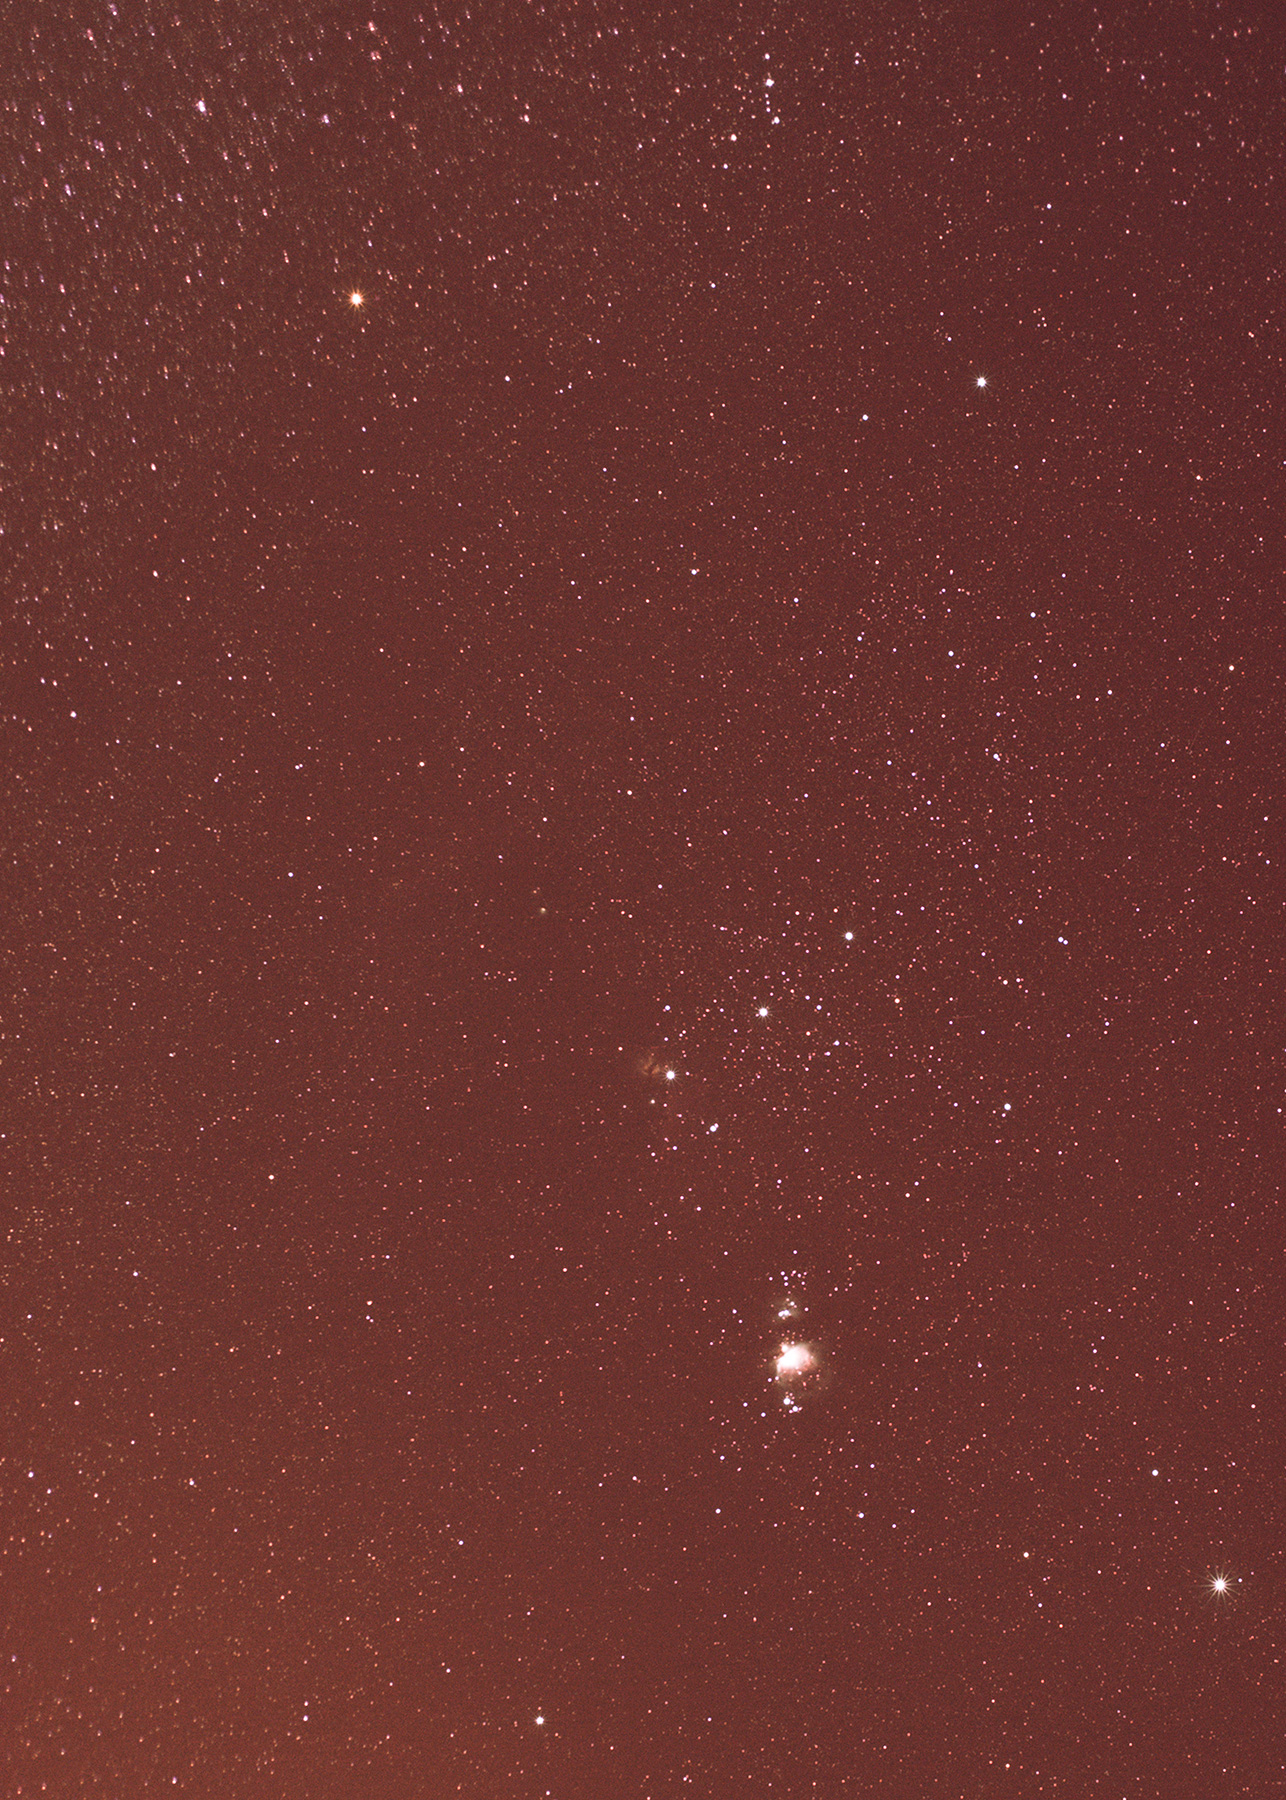
During nautical twilight, the sky is getting noticeably darker, but the horizon is still visible. While not fully dark, you’ll likely need a form of artificial light to conduct outdoor activities, and the sky is dark enough for sailors to make nautical readings based on the stars, thus the term “nautical twilight”.  After sunset, nautical twilight begins when the center of the Sun drops 6° below the horizon and ends when it is 12° degrees below the horizon. Similarly, it begins in the morning when the center of the Sun is 12° below the horizon and ends when it is 6° below the horizon.

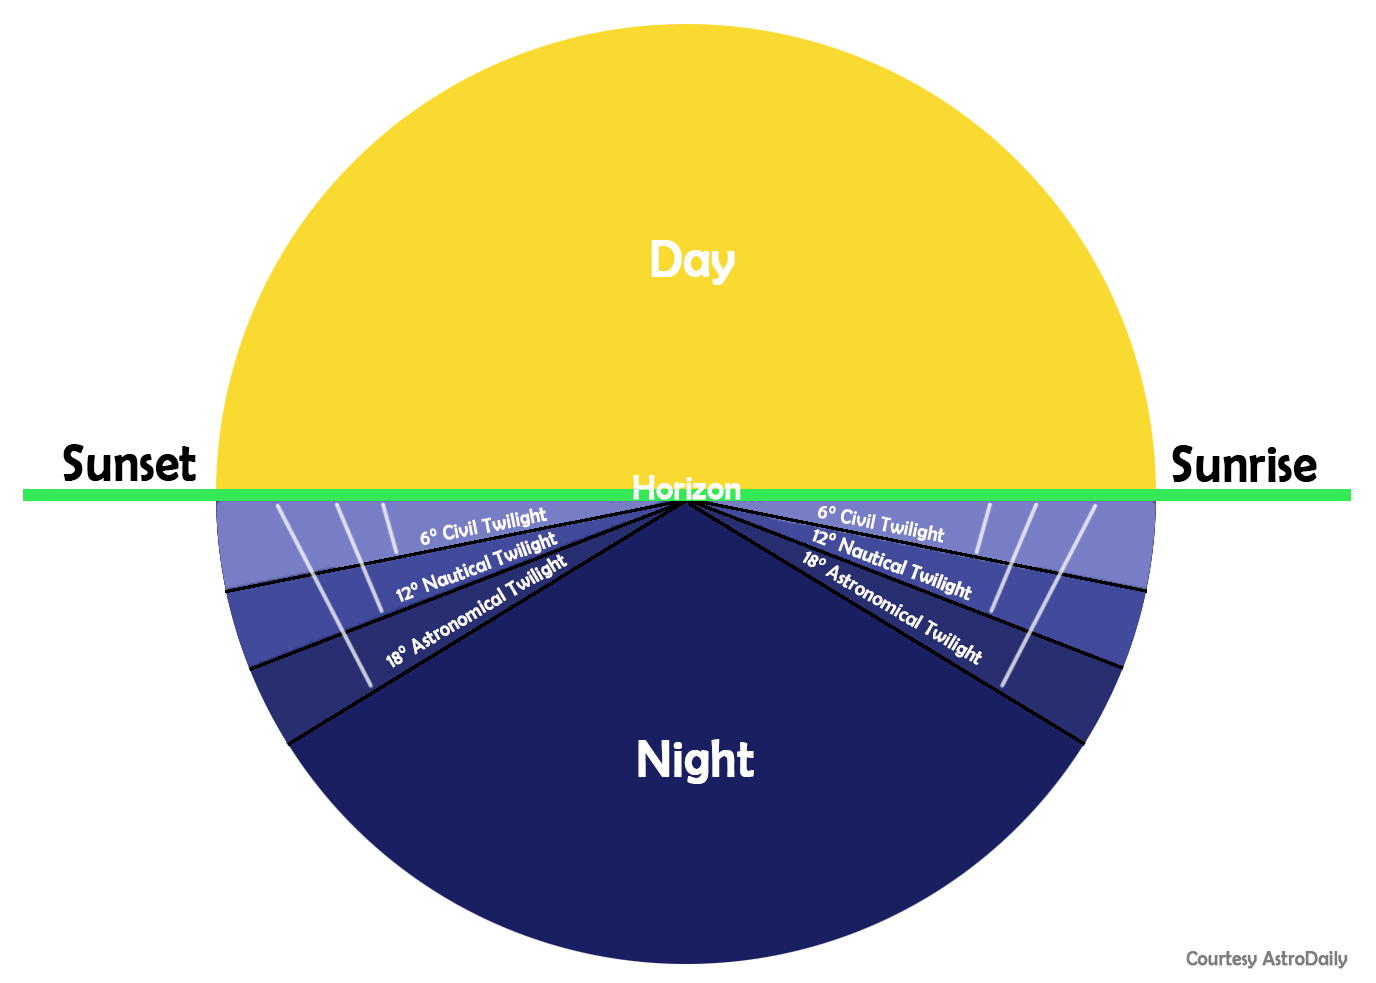
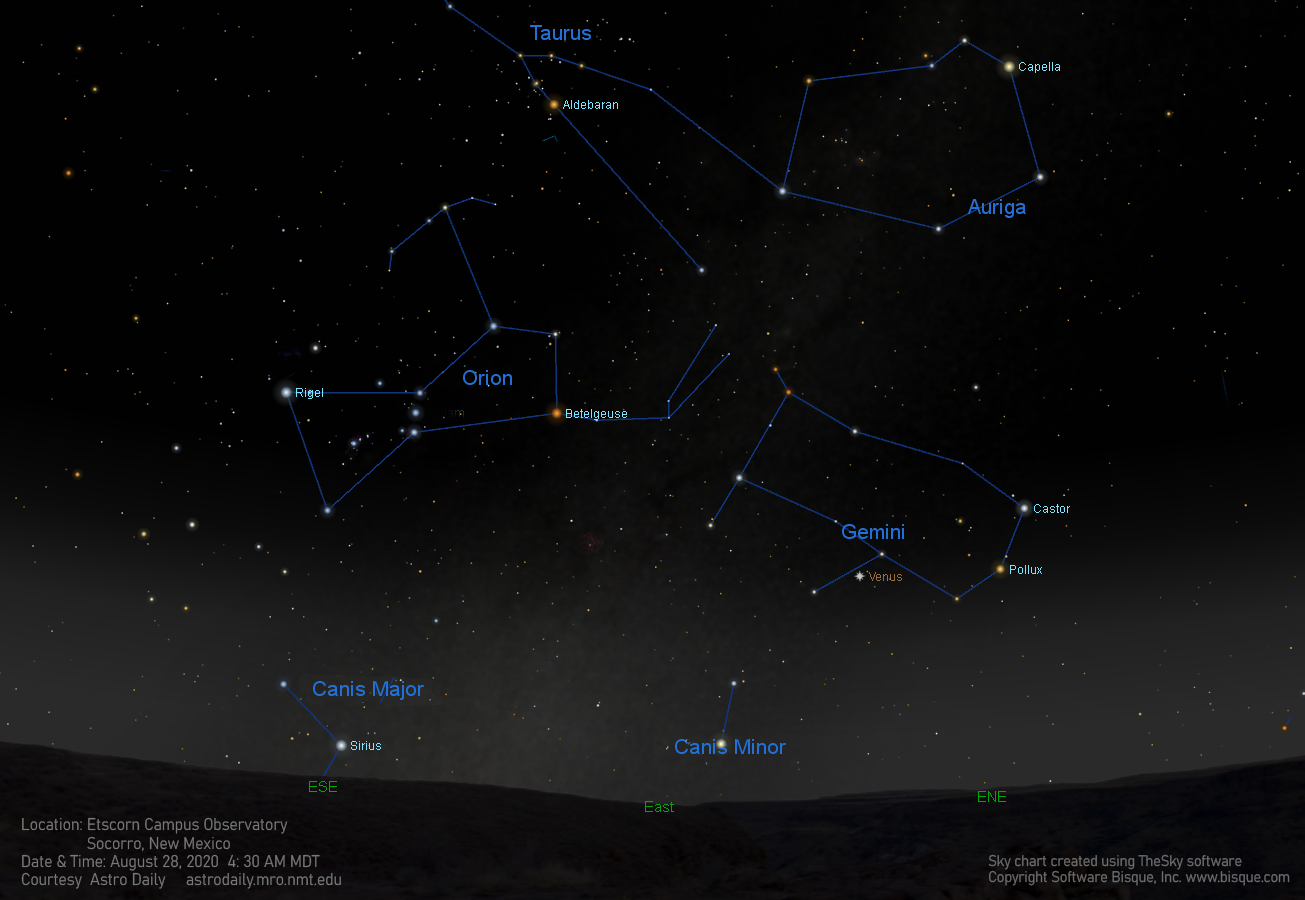
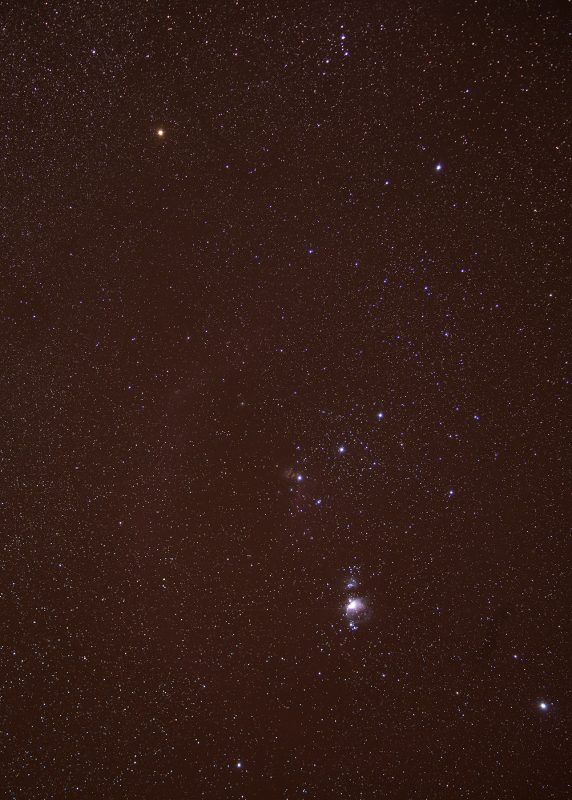
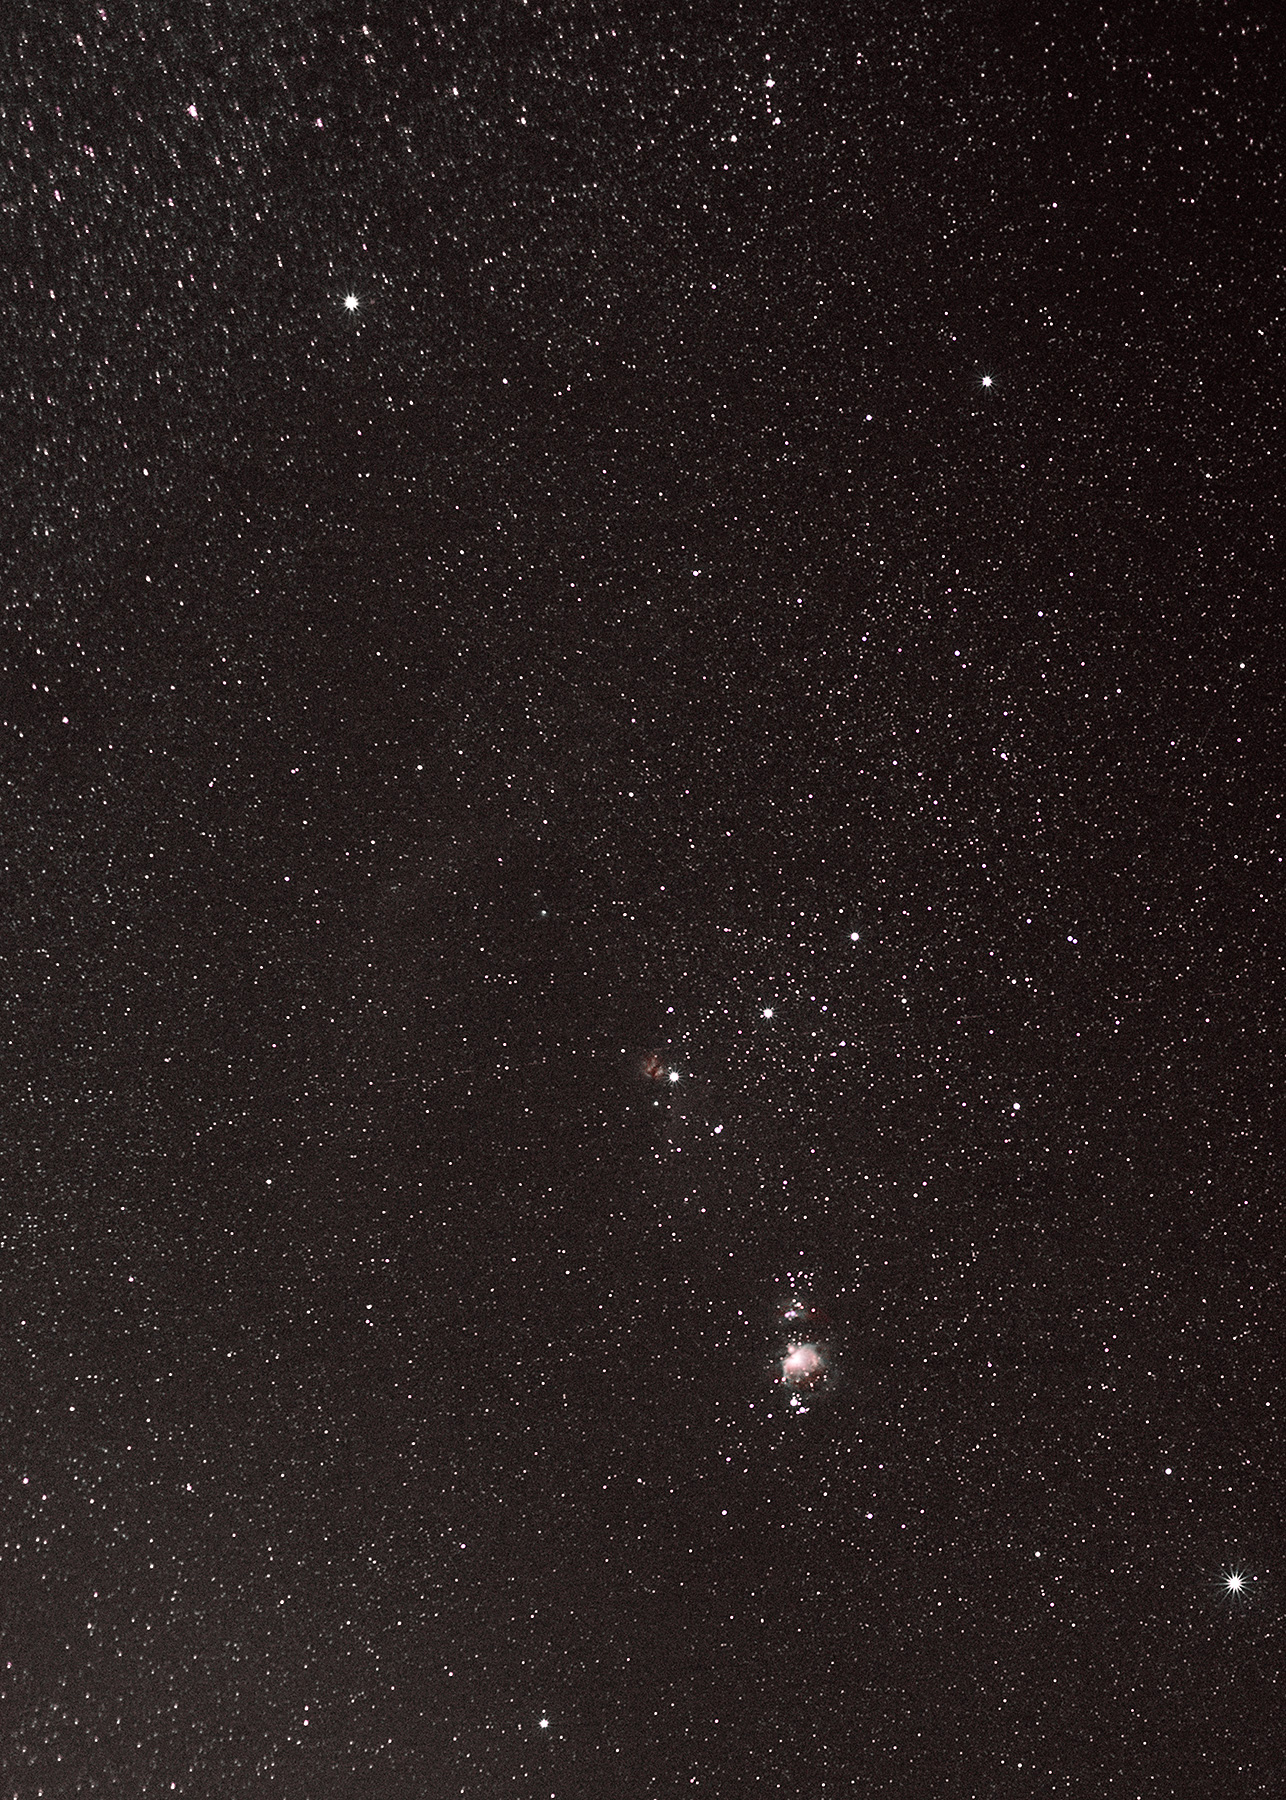
Finally, astronomical twilight is dark enough to be indiscernible from total darkness for the average observer, particularly in a light polluted sky. The horizon is no longer visible, and many faint stars and celestial objects can be seen. However, the sky is not fully dark in the evening until the center of the Sun is 18° below the horizon; you have to wait until this point to see the faintest celestial objects. The sky remains fully dark until the Sun is less than 18° below the horizon in the morning. The chart above illustrates the different types of twilight and their corresponding solar angles (not to scale).

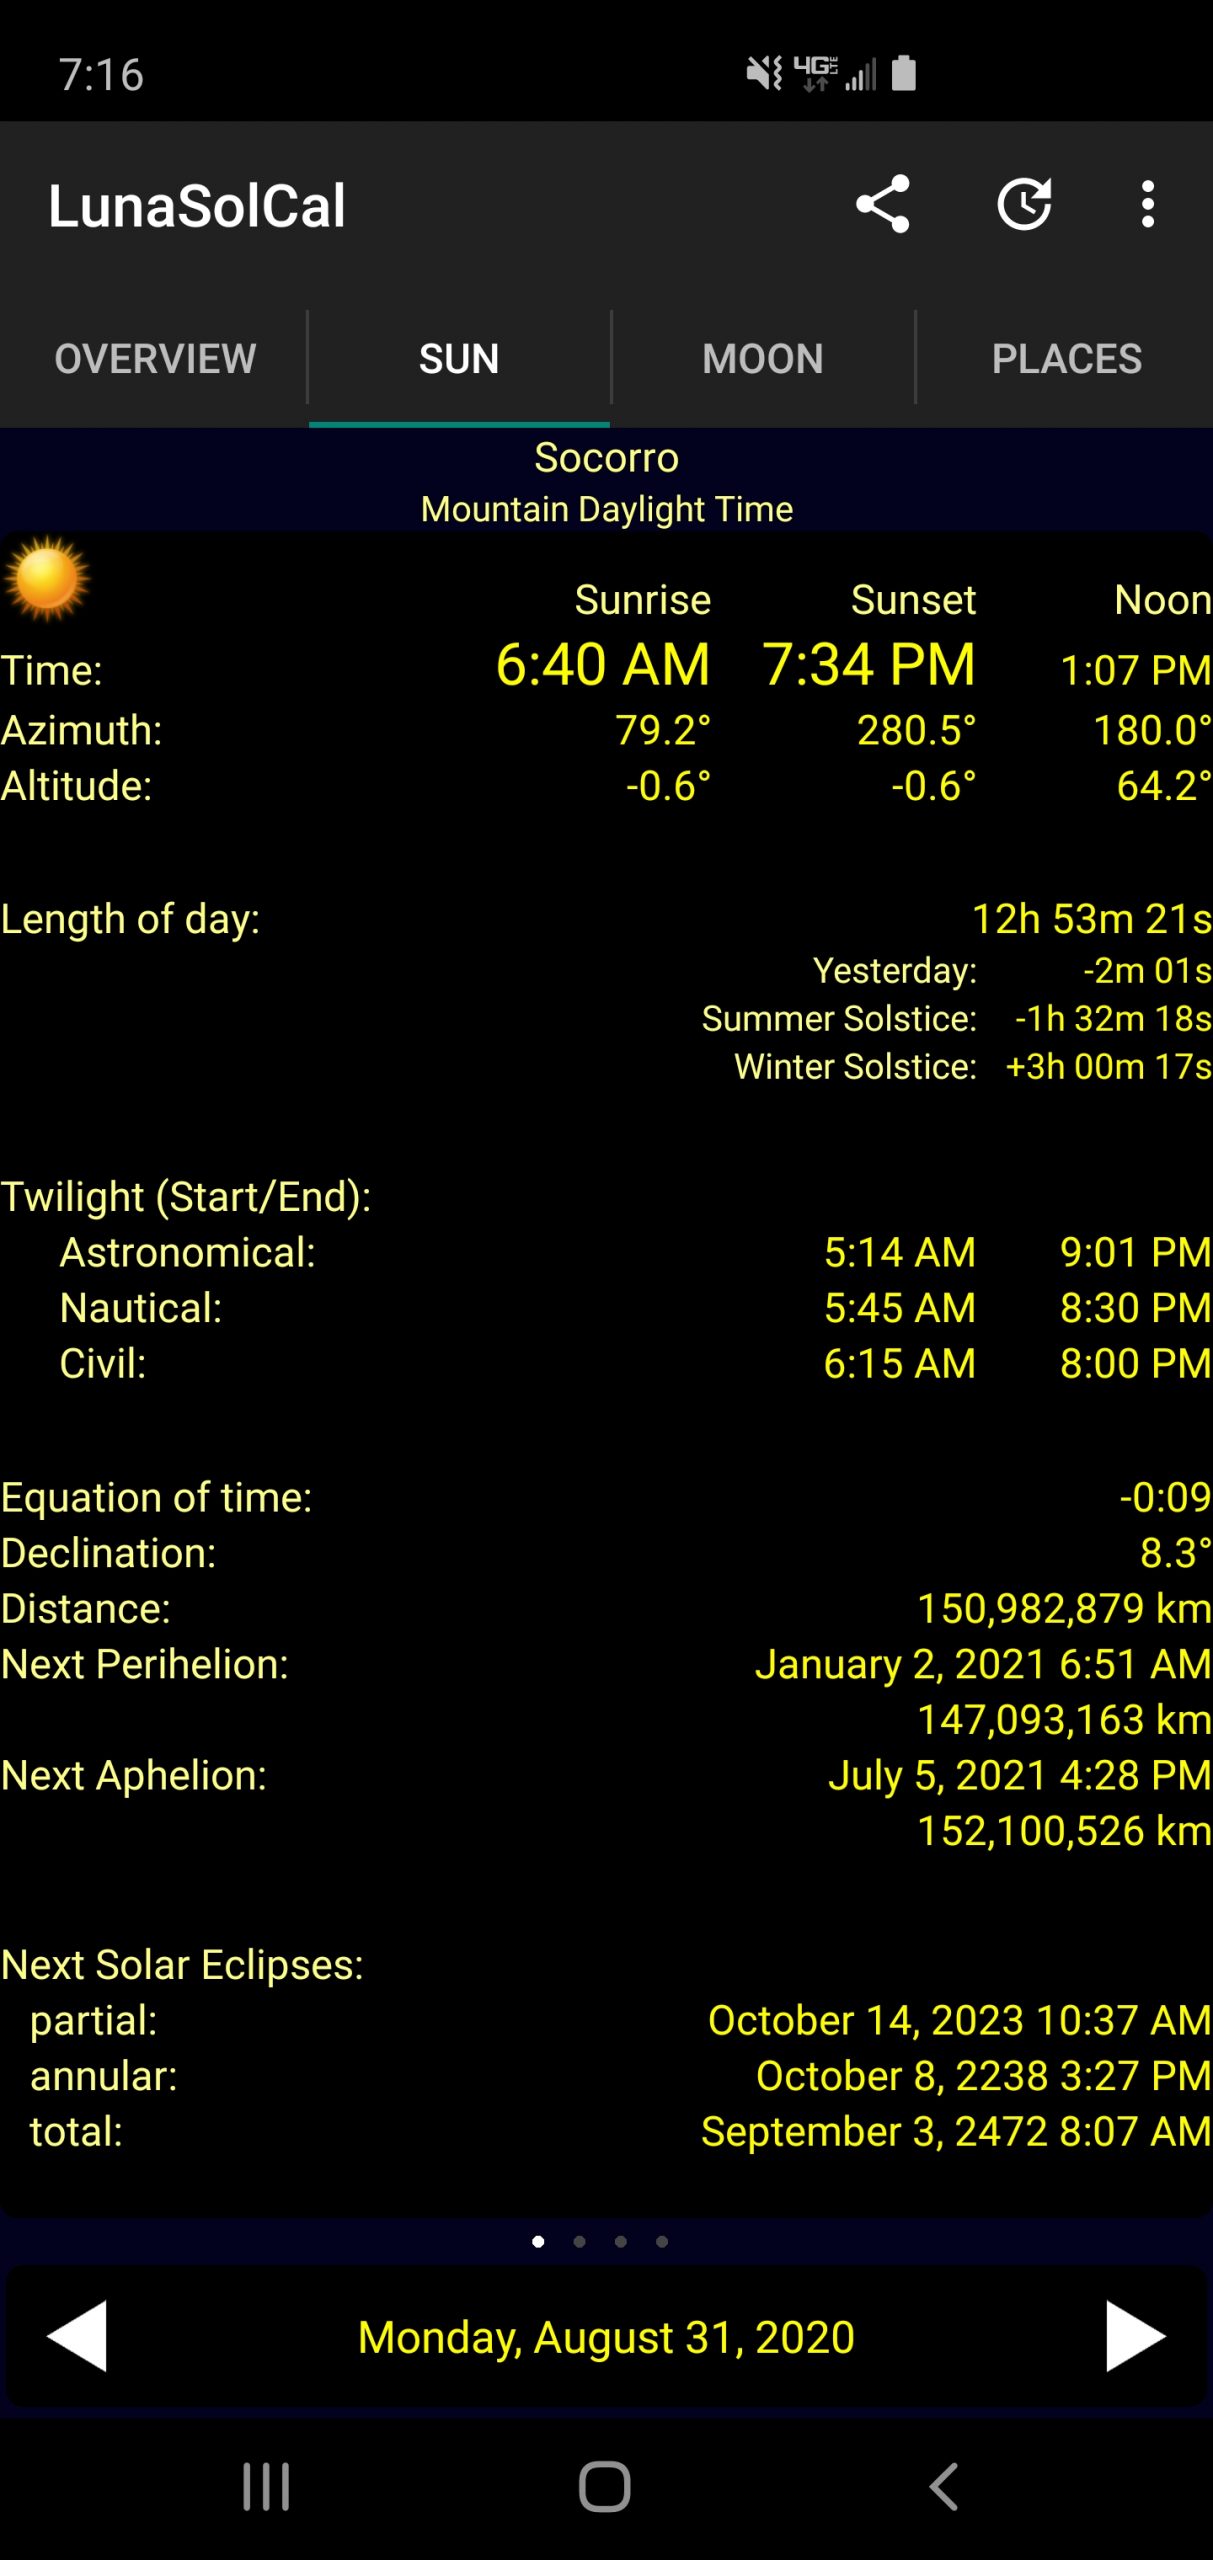
Now that we have the different types of twilight covered, I’d like to once again share one of my favorite tools to get the times for these events, LunaSolCal. In a previous blog post I talked about how useful I find this app to be for telling sunrise and sunset times, moonrise, moonset, and lunar phase information, and much more. LunaSolCal is available for both iOS and Android devices. As you can see in the print screen below, when you choose the “Sun” tab, the app displays not only the time of sunrise and sunset for your chosen date and location, but the times for the three types of twilight as well. This app is one of the best free tools I’ve come across, and I heartily recommend it!

M. Colleen Gino, MRO Assistant Director of Outreach and Communications

“Astronomy Along New Mexico’s Route 60 Dark-Sky Corridor”

New Mexico Tech’s Magdalena Ridge Observatory, Etscorn Campus Observatory, and the National Radio Astronomy Observatory’s Very Large Array aren’t the only facilities conducting astronomical observations and research in our dark sky area around Socorro. From Magdalena to Pie Town, the number of amateur astronomers building observatories for both private and business use is steadily growing. One such example is a recently constructed private observatory near Pie Town that is outfitted with a 40-inch reflecting telescope, one of the largest aperture private telescopes in the country. Another facility of note is the nearby SkyPi Online Observatory, where users can operate robotic telescopes to image celestial objects remotely. The Magdalena Astronomical Society, well known for holding the popular Enchanted Skies Star Party, operates a 16-inch computer-controlled telescope at John Briggs’ Astronomical Lyceum in the dark sky village of Magdalena. And that’s just scratching the surface of the astronomical activities occurring from Socorro all the way to the Arizona border along Route 60.

Enchanted Skies Star Party attendees visit the Magdalena Ridge Observatory.

You can read all about this and more in the MRO Department of Outreach and Communications’ monthly newsletter. The September issue of the MRO Inquirer, which features the article described above by guest author John Briggs, will be sent out to members of the Friends of MRO next week; early and direct delivery of MRO’s monthly newsletter is one of the perks of membership. If you’re not a member of our Friends group yet, don’t despair – our newsletters are released to the public in the middle of each month.

Smartphone Photography student photographing the Moon using one of New Mexico Tech’s Etscorn Campus Observatory telescopes.

We kindly ask that you consider becoming a Friend of MRO and support the work the MRO Outreach team is doing. Along with publishing a monthly newsletter, the Outreach Department produces the Astro Daily articles and is active on all social media platforms, sharing our love of astronomy with the local community and beyond. While our monthly public star parties and seasonal observatory public tours are on hold due to COVID-19 restrictions, we expect to be able to offer virtual streaming star parties and observatory tours soon. Your membership contribution would help support these endeavors, and make you a vital part of our mission to develop education and outreach programs, and to expand the frontiers of astrophysical research.

If you are interested in learning more about Friends of MRO, please follow this link.

Why So Sirius?

If you’re awake in the hours before sunrise you’re in for a treat. Sirius, the brightest star in the night sky, is currently making its appearance in the early AM, rising a few hours before the Sun. Sirius first became visible in the east less than an hour before dawn a few weeks ago, its helical rising. Since stars rise about 4 minutes later every day, it will be visible longer and longer before sunrise. By the end of November, it will rise about 9 PM in the evening.

The Dog Star, as it is called, is in the constellation Canis Majoris, the big dog. The term “dog days of summer” comes from the fact that for those of us in the northern hemisphere Sirius in in the same portion of the sky as the Sun in July and August. The ancient Romans thought that since the Dog Star is so bright it must be hot, and that its heat added to that of the Sun’s made the 20 days before and 20 days after its alignment with the Sun all the hotter.

Sirius is a binary star; Sirius A, the brightest of the pair, is a hot main sequence star, undergoing thermonuclear fusion in its core. Sirius B is a white dwarf, a stellar corpse. Known as the Pup, Sirius B was also a bright bluish star once more massive than Sirius, but it exhausted its resources and ceased fusing hydrogen to helium some 120 million years ago.

Sirius is about 25 times more luminous than our Sun and nearly twice as massive. If our Sun was replaced by the Dog Star, we wouldn’t be having this conversation. The dog days of summer would be a freezing respite compared to the temps the Earth would be exposed to. Luckily, Sirius is just a fairly close neighbor at 8.6 light years away.

The star chart above shows where you can see Sirius in the wee hours of the morning. If you’re not an early bird don’t despair; just wait a few months and you will be able to observe this glimmering orb in the evening.

M. Colleen Gino, MRO Assistant Director of Outreach and Communications

Smoky Sunsets

By Shelbi Etscorn

In my last article, I talked about the green flash that can be seen at the moment when the sun is below the horizon. To recap, this green flash happens because of the way light is refracted in the atmosphere. When the sun is just below the horizon all colors that have longer wavelengths (like the reds and oranges) are out of our line of sight below the horizon. All colors with shorter wavelengths (like the blues and violets) are dispersed into the atmosphere above the horizon where we aren’t able to see them. But the green is just right for us to be able to see a momentary flash.

In this last week (and just about every summer in New Mexico), you may have noticed a different phenomenon that can be explained with the same science behind the green flash. With smoke in our skies from wildfires in surrounding states, sunrises and sunsets have suddenly become even more beautiful than usual in our New Mexico skies. But why does smoke, which we usually think of as an ugly, hazy blob, help create such beautiful skies every dawn and twilight?

Even without smoke in the atmosphere, sunrises and sunsets are very colorful.

I’ve already given you a hint. As you may recall, the white light from our sun is actually made up of all the colors of the rainbow. A rainbow is simply the light from our sun being “bent” or refracted by water droplets in the air, causing the different wavelengths of light to separate to the point that each individual color is distinguishable.

Going through the colors of the rainbow in order (remember ROY G. BIV?), the colors found at the beginning have the longest wavelengths, while the ones at the end have the shortest. The colors with the shortest wavelengths can more easily interact with particles in our atmosphere and are scattered by them, while the longer wavelengths aren’t very much affected. This is why sunrises and sunsets already appear to be red, orange, and yellow. These are the colors that have the easiest time making it through our atmosphere to arrive at our eyes, although some of the shorter wavelength colors still make it through as well.

Last week the smoke was so thick near the horizon that the Sun, which is usually too bright to look at without the use of special filters, was easily visible as it rose. All of the features are from smoke, none are features on the surface of the Sun itself.

When wildfires fill our atmosphere with an abundance of minuscule particles, the effect our atmosphere already has on sunlight becomes amplified. Even more of the blues and violets are scattered out of the light that we eventually see, making the reds and oranges of that light appear even more vibrant and intense and causing beautiful, deep colors to appear in the sky.

Crescent Moon colored orange by smoke in the air, setting near Socorro’s M Mountain. Image courtesy Dave Finley, Public Information Officer for the National Radio Astronomy Observatory.

While we can be thankful for the beautiful display, smoke in the air from wildfires does cause issues with astronomical observatories, and, much more importantly, is a sign that somewhere homes and lives could be at risk. While they’re here, I get up early in the morning to enjoy the stunning colors that paint the sky, but I look forward to the day our sunsets go back to their previous brilliance, which has always been rich and vivid enough for me.

There’s an App for That!

Have you ever found yourself looking at a night sky full of so many stars that you’re unsure of which constellation is which? This may not be a problem for those of you in highly populated areas with light polluted skies who are lucky to see a handful of the brightest stars at night, but for those of us in rural dark-sky locations, the struggle is real. Especially when you’re trying to identify some of the constellations with dimmer stars and less recognizable patterns, such as Camelopardalis, Microscopium, or Serpens Caput, to name just a few. I tell you what: my ability to pick out those tricky constellations on my own is kaput, so it’s a good thing there’s an app for that!

There’s actually a heap of sky map apps to choose from for both Android and iOS that help you identify what’s in the sky and much more, so you can take your pick. One of the most basic apps I use is Sky Map, free for Android devices. You simply point your smartphone or other handheld device at the sky and Sky Map shows you what what’s up in that exact location in the sky, day or night.

Sky Map screen view.

Sky Eye is similar to Sky Map, in that you point it toward the sky and it shows you what’s at that point in the sky in real time, but it has other useful features as well. In addition to the real-time mode that uses your device’s GPS to determine your accurate location and shows you what up currently, you can set it for a particular date, time and location. Not only does it display constellation lines and labels, major star names, and Messier objects, but it includes the altitude – azimuth, equatorial coordinates, and hour angle of the objects in your field of view. It even has a night vision mode to preserve your dark adaptation. This useful app is free and available for both iOS and Android devices.

Sky Eye screen view.

So the next time you see so many (or so few!) stars that you’re not quite sure what you’re looking at, consider using one of these handy handheld planetarium apps to find your way in the sky.

M. Colleen Gino, MRO Assistant Director of Outreach and Communications

Stack It Good!

Yesterday in “Stack It!” I talked about a test I was running to see how the result of stacking hundreds of extremely short exposures compared to the results you get with a single long exposure image; you might want to read that first for the background information on the results I’m sharing today.

To pick up where I left off yesterday, it took a LONG LONG LONG time to process the stack of 422 images – over 16 hours! The processing was taking up most of my computer’s brain, so I couldn’t really do anything else while it was thinking so hard. It’s not wise to deny me the use of my computer for 16 hours. By the time I saw the product of the stack, at 11pm last night, I was too tired to do anything but take a cursory glance at it. I was not impressed with what I saw.

After a good night’s sleep, an excellent cup of coffee, and a fortuitous catch of a smoky sunrise, (image below) I felt excited to get my hands on that ugly, unprocessed stacked image and see how much I could pretty it up.

Not an alien planet on the horizon, but our own little star, rising through uneven layers of smoke and particulates this morning.

I opened it up and, yup – it was just as ugly as I remembered it to be. But that’s not unusual, most images need a bit of processing to bring out their potential. Next, I tracked down an image to compare the stack to, which was a single long exposure image of Orion, taken a couple of years ago by fellow MROI astrophotographer, Dylan Etscorn. Let the comparisons begin!

The unprocessed stack of 422 two-second images. Eww. But you can clearly see the
Orion and Running Man Nebulae, and just see the Flame Nebula in Orion’s belt.
Single tracked image; taken with Nikon D850 with 80mm lens at f/4.5, ISO 640, 3-minute exposure.
Again you can easily see the Running Man and Orion Nebulae, and you can see not only the Flame
Nebula in the left-most star of Orion’s belt, but you can barely make out the Horsehead Nebula below it.

Right out of the gate, the single exposure definitely looked better than the stacked image. And keep in mind, the stacked image consists of 14 minutes worth of exposure time, while the single image was just three minutes long.

Next, I did some basic processing to both images, mainly just trying to get the red out of the background and stars of the stacked image while trying to leave the red in the nebulae, and adjusting the contrast and color a bit in the single exposure.

Stacked image looking a little better after some basic processing.
Single exposure looking much better after basic processing; red background tinge reduced.

After getting this far, I could clearly see the winner so decided not to spend any more time on image processing. The images below are identical to those directly above, just cropped so you can more easily see the detail, or lack thereof, in the nebulae.

In the cropped stacked image; you can start to see just a hint of the Horsehead Nebula.
In the cropped single image, not only can you easily see all the nebulae I’ve mentioned so far, but you can see a hint of Barnard’s Loop, a faint but large emission nebula structure in the Orion Molecular Cloud Complex.

The images below are cropped once more, to focus on the Orion, Running Man, Flame, and Horsehead Nebulae.

Stacked image. Meh.
Dylan Etscorn’s single three-minute tracked exposure; pretty nice detail for an 80mm camera lens!

For this particular test anyway, I’m changing the chant from “Stack It! Stack it Good!” to “Stack It? Stack it, Baaad.”. Now, that doesn’t mean that you shouldn’t try stacking short exposures, especially if that’s your only option. In fact, I’m sure I’ll try this again myself. I could even reprocess this set of images with different parameters and likely come up with a better result, although I’m loathe to give up the use of my computer for 16+ hours again anytime soon. But in spite of the 4 AM wakeup call to shoot Orion, over 800 shutter actuations on my beloved D850, the 16+ hours of computing time, and a less than dazzling final result that I’m likely just going to toss, I’m glad I went through the exercise. In the end, I’m of the opinion that it is better to have stacked and tossed, than never to have stacked at all.

M. Colleen Gino, MRO Assistant Director of Outreach and Communications

Stack It!

While perusing the web yesterday, I came across an interesting astrophotography video tutorial about stacking hundreds of very short exposures to produce an image that is comparable to a single image with a much longer exposure time. The point was that while many people have a camera on which they can control the exposure length, and a tripod on which to mount the camera and keep it stable (perfect for relatively short exposures), not nearly as many people have some kind of tracking mount necessary for taking long exposure astrophotos. Personally, I’ve not had much success with this short exposure stacking method in the past; the resulting stacked image had nowhere near the detail of a single long exposure. But, it’s been a while since I tried it, so I figured it was time to give it another go!

Star trails over the Radio Sun Dial at the Very Large Array in New Mexico.

First, a little background information for those not familiar with astrophotography. One of the primary challenges we face in photographing the night sky is getting an image without noticeable star trails. Unless our intention is to shoot star trails, as in the image above, we want to see nice, round, pinpoint stars in our image. This is not as easy as it sounds, because the Earth is rotating on its axis so the stars appear to move through the sky. This motion of the stars is not really noticeable when you’re just watching the sky, but it becomes very noticeable in a photograph taken with a camera on a fixed tripod. The longer the exposure time of the photograph, the more star trailing you get.

Note how the stars are somewhat elongated in this 30-second exposure of Comet NEOWISE I shot at a focal length of 85mm.

The way we account for this is by attaching the camera to a tracking mount, a device that rotates at the same rate as the Earth but in the opposite direction, resulting in stars that appear (mostly) motionless (and therefore points of light rather than streaks) in our camera’s field of view. If you don’t have such a device, the only way to achieve round stars is to limit your exposure time such that you don’t capture the apparent motion of the stars in your photograph.

A single tracked 10-minute exposure of the Milky Way shot with a 50mm lens on a Nikon D850.

Enter the astrophotography 500 rule, a simple formula for calculating the maximum exposure time for the focal length of the lens you’re using to get round stars. For full-frame cameras, you simply divide 500 by the focal length of your lens, and the resulting number is the approximate number of seconds you can expose without seeing elongated stars. (If you have a crop sensor in your camera, the formula is 500/lens focal length/1.5.) Note the word “approximate”; to get accurate results you must take much more into account, such as the pixel size of your sensor, the f-stop of your lens, the declination of the object you are photographing, and atmospheric conditions. A full explanation of getting an accurate result is beyond the scope of this article (though I’ll likely discuss it in the future), so we’ll stick with the approximate result for now.

As an example, this morning I went out in the early AM to photograph the constellation Orion for this exercise in stacking short exposures. I was using a Nikon D850 which is a full-frame camera, and a 50mm lens so I could get the whole constellation in my field of view. According to the 500 rule, my calculation would be 500/50=10, so I should see little to no star trailing in a 10 second exposure. Turns out I had extremely noticeable star trailing in that 10 second exposure, so I kept reducing the exposure time until I was happy with the results. Turns out I had to reduce the exposure time quite a bit, this being primarily due to Orion’s location — it was rising in the east, so its apparent motion over the same period of time was greater than if I were shooting, say, close to the north pole, as illustrated in the image below (another topic for a future article!). However, the 500 rule gave me a pretty good starting point.

Note the difference in the length of the star trails in this image, how they get longer and longer the further the stars are from Polaris, the practically stationary star in the upper right portion of the image.

Now to get back to the exercise of stacking images. I took 422 two-second exposures, so the sensor was exposed to light for a total of 844 seconds. All things being equal, this stack of images with a total integration time of 844 seconds should yield similar results as a single 844 second (14-minute) exposure. All things aren’t equal in this scenario, so the result won’t be exactly the same, but how close will it be? This is what I’m trying to determine: how does a stacked set of images “stack up to” a single image of equal integration time?

Well, I hate to disappoint you, but I can’t answer that question today. Turns out, it takes a very, very, long, long, LONG, long time to calibrate, align, and stack 422 images (as well as 153 dark frames, 104 bias frames, and 102 flat frames, more on that later). My computer has been diligently working on it for about six hours so far, and has about another five or so hours to go. So please tune back in tomorrow, when I share my results!

M. Colleen Gino, MRO Assistant Director of Outreach and Communications

The Green Flash

The green flash. While at first, it may sound like the love child of two DC comic book characters, its name is actually much more literal. It’s a flash. That’s green. If you’ve seen Pirates of the Caribbean: At World’s End, you may be familiar with the idea. While Hollywood’s version of the green flash is massive and spectacular, the real life version (yes, there is a real life version) is much more subtle and easy to miss.

It can be seen for a brief moment on the horizon, right around sunrise and sunset when the conditions are right. But what are these conditions and what causes the last rays of sunlight to appear to us on Earth as a bright green?

Part of the answer lies in the refraction of light that happens in the Earth’s atmosphere. The most recognizable and well known example of light refracting is the rainbow. As sunlight makes the quick transition from air to water during its travel, the light is bent, or refracted, and separates out into all the colors contained therein (think Dark Side of the Moon album cover). You’ve also seen this effect if you’ve stuck a straw into a clear glass of water. The straw suddenly seems to defy physics and abruptly veers from its path so that the part above water appears to not quite connect to the part below water.

If you subscribe to our newsletter, you’ve also read about how we at the MROI have to deal with the atmosphere’s pesky tendency to refract starlight. In Project Scientist Michelle Creech-Eakman’s Instrumentation Station article titled What is a Delay Line and Why Do We Need Ten of Them?, she likens the light emanating from the stars to a sheet of paper with a picture on it. At first the picture is flat and perfect. But as this light paper reaches our atmosphere, the light paper begins to crumple and distort. To find out how that light paper gets flattened back out into an image we can see, take a look at Dr. Creech-Eakman’s article in the June newsletter.

But back to the green flash. As with the rainbow, one effect of this bending is for light to be separated into its distinct wavelengths: different colors. The green light is the color that is in our line of site while the rest of the colors dip below the horizon, thus: a green flash.

While the green flash is most commonly observed when looking out across the ocean, it can be seen from anywhere in the world. It is easiest to see when the observer has an unobstructed view of the horizon and the air is clear and still. Next time you happen to be outside right before sunrise or right after sunset, take a look and see if you can spot it! This is not a suggestion to stare directly at the sun. Wait for the moment just after the sun has set or the moment just before it rises. We can’t promise any souls will return to Earth as was signified by the appearance of the green flash in the Pirates movies, but we can guarantee it’s a pretty neat sight!

Article by Shelbi Etscorn of the Magdalena Ridge Observatory Department of Outreach and Communications.

Painting The Night With Light!

Those of us who do astronomical observing go to great lengths to seek out dark sky sites to carry out our observations, whether professional or amateur. But occasionally I tend to stray from the accepted norm, and rather than avoid the light I create it – I’m a light painter!

Image #1, Milky Way over the Magdalena Ridge Observatory Interferometer facility.

Light painting is an art form using various sources of light to create a pattern or illuminate objects in a dark scene, which is captured by taking a long exposure photograph. Exposure times for such photographs can range from a few seconds to an hour or more, and the resulting images are unlike anything you could see with your naked eye. To create a light painting photograph, you need to use a camera on which you can control the shutter speed, and a tripod, to keep your camera steady for the duration of the exposure.

Image #2, playing with light at the MROI Beam Combining Facility.

In its simplest form, parts of a dark scene are illuminated with a light source such as a flashlight. This is the method I used in the images numbered 1, 2 & 3. In image #1 I painted the foreground and structures with a red flashlight from a distance. Had the structures not been illuminated in this way, they would have appeared as silhouettes. This method of illuminating objects was employed on the header image of this post as well, although it was more involved because we used a color-changing flashlight to illuminate the delay line’s supporting structures, and a laser light to illuminate the delay line and walls. The camera shutter was open for more than five minutes in this image.

In image #2 above, both the subject and the background structure were illuminated with a red flashlight, then the wings were created by flashing an image of wings on the wall behind the subject with a camera strobe light attached to a special device much like a miniature slide projector.

Image #3, observing under the Milky Way in the canyons outside of Socorro, New Mexico.

In image #3 above, I “painted” the walls of the canyon with a red flashlight, then painted the telescope observer from behind with a flash unit.

Image #4, light painting tools. Most of the tools I use are homemade, but I base their construction around the universal connector manufactured by Light Painting Brushes (LPB), which enables you connect many sizes of flashlights to a standard tool size. I also use many of LPB’s tools, such as fiber optics brushes, colored light hoods, and light sabers, shown in the left side of this image.

A more complex method of light painting is to move through the dark scene while creating a pattern with one or more light sources, which are usually specialized light painting tools such as those shown above in image #4. The tool is connected to a light source (flashlight), then you move the tool in a controlled motion to create the desired pattern.

Image #5, light painting around one of the telescope domes at New Mexico Tech’s Etscorn Campus Observatory.

Images numbered 5, 6, and 7 are examples of this method. The slight difference between image number 7 and the others is that the light sources used to spell out MROI were sparklers rather than typical light tools.

Image #6, a vortex of light painted around an MROI telescope.
Image #7, MROI spelled out by MROI staff members using sparklers, taken at the New Mexico Tech golf course.

It is also possible to create a light painting effect simply by taking a long exposure in a dimly lit scene, as in image #8 below. In this case the tent appears red not because it was painted with a red flashlight, but because the inside of the tent was lit with red lights. The light streaks in the scene were from the flashlights people were using to illuminate their way in the dark as they passed by my camera.

Image #8, people walking to and fro at the Enchanted Skies Star Party dark sky location in Magdalena, NM.

Another method of creating an intriguing light pattern in the dark is steel wool spinning. While it can be considered a type of light painting, it is in a category all its own. To create this type of image, you stuff a metal whisk with steel wool, ignite the steel wool using a lighter or 9v battery, then spin the whisk, which is suspended on the end of some type of cable, until the steel wool burns itself out. This is what was done in image #9 below. This method is not for the faint of heart, as you really are “playing with fire”. Moreover, you must be extremely cautious of how and where this activity is carried out, as the sparks from the steel wool can easily start a fire. However, with the proper precautions you can safely produce a stunning image.

Image #9, steel wool spinning at New Mexico Tech’s Etscorn Campus Observatory. In this image, I am spinning the steel wool on a whisk on a cable to the left, while our beloved Dr. Dan Klinglesmith (who passed away last year) was spinning the steel wool in a whisk in a drill from inside the telescope dome. I was using a remote trigger for my camera to produce this image.

Since I discovered the art form of light painting about 5 years ago, it has become one of my favorite photography genres. I’ve involved dozens of friends in the process of creating various types of light paintings, and as far as I can tell they’ve all enjoyed the process as much as I have. So the next time you find yourself in a dark setting with a camera, tripod, and a flashlight or two, you might want to try your hand at painting the night with light!

To see more light painting images, you can visit my Flickr page at https://www.flickr.com/photos/inlightful/albums

M. Colleen Gino, MRO Assistant Director of Outreach and Communications

Langmuir Laboratory Featured in MROI August Newsletter

There’s no better time to talk about thunderstorms and lightning than during New Mexico’s monsoon season when we have plenty of both! The Langmuir Laboratory for Atmospheric Research, which is right up the road a bit from the Magdalena Ridge Observatory Interferometer, has been conducting research on Magdalena Ridge since 1963, when the facility was completed and dedicated. This month we are thrilled to feature an article about Langmuir Laboratory and its research written by Langmuir Director and New Mexico Tech Atmospherics Physics Professor, Harald Edens.

Image Credit: Harald Edens, Langmuir Laboratory

Below is an excerpt from Dr. Edens’ article:

“Experience gained by the early researchers lives on within the group to this day. In the atmospheric electricity research community, Langmuir Laboratory is well known for its expertise in lightning triggering, ballooning, radar, and other specialized instruments, much of which is custom designed and built in-house. Such instrumentation has proven transformative in the field of lightning research. Most recently, the late 90s saw the development of the three-dimensional Lightning Mapping Array (LMA), which is a set of ground-based VHF receivers that collectively map out lightning channels in three dimensions and time. It gives a complete picture of lightning activity inside a thunderstorm. Over the last decade, work at Langmuir Laboratory has redefined lightning interferometry, with the design of a VHF continuous broadband digital interferometer. It allows lightning flashes to be recorded and analyzed in their entirety, and in unprecedented detail. This resulted in important recent discoveries addressing the age-old question: How does lightning get started inside a thundercloud?”

Image Credit: Harald Edens, Langmuir Laboratory

To read about Langmuir Laboratory and more, visit the MRO website where our newsletters are available for free download.

If you’d like to receive the newsletter on the first of the month delivered directly to your email inbox, please consider becoming a member of our support group, Friends of MRO.